 how-to
How to Choose Winter Hiking Boots for Cold Trails in 2026
Last Updated: November 5, 2026
Quick Summary
To choose winter hiking boots, start with your conditions rather than the boot: match the insulation rating to your expected low temperature, then adjust for how hard you'll be working. Check waterproofing, traction, and fit with your winter socks, and size up for thicker socks. A boot rated to -20°C covers most cold-weather day hikes.
- Match the insulation rating to your expected low temperature, then adjust for your activity level.
- Over-insulated boots make feet sweat, and wet feet get cold fast.
- Test fit with your winter socks on and look for a thumb's width of toe room.
- Add microspikes for packed snow and icy trails, and crampons for steep, hard ice.
- Pull insoles out after a hike and air-dry boots at room temperature, never near a heater.
Table of Contents
- Start With the Conditions, Not the Boot
- Why Insulated Hiking Boots Need the Right Warmth Rating
- Waterproof Winter Hiking Boots: Membranes, Uppers, and Maintenance
- Winter Hiking Boot Traction: Lug Depth, Rubber Compounds, and Traction Devices
- Winter Hiking Boot Fit: Sizing, Toe Room, and Heel Hold
- Boot Height, Gaiters, and Snow Protection
- Managing Moisture and Drying Boots in the Field
- Match Boots to Your Terrain and Trip Conditions
- Frequently Asked Questions
Start With the Conditions, Not the Boot
Most people choose winter hiking boots by falling in love with a pair online, then discovering on the trail that it's too warm, too cold, too stiff, or too slippery. The smarter order is reversed: read the conditions first, then pick the boot.
Here's what most guides get wrong: they rank boots by brand or price when the deciding factors are temperature, activity level, and terrain. A boot that's perfect for a slow snowshoe walk can be a sweaty, blistering mistake on a fast climb.
A Temperature-to-Insulation Decision Guide
Insulation ratings are generally meant to reflect how cold a boot keeps your feet comfortable while you're moving. Match the rating to your expected low temperature, then adjust for how hard you'll be working.
- Mild winter, around -10°C and above: light insulation or an uninsulated waterproof boot with a warm sock.
- Cold days, roughly -10°C to -20°C: a boot rated to about -20°C suits most active hikers.
- Deep cold, -20°C to -30°C: look for a boot rated to -30°C, and size up for thicker socks.
- Extreme cold or long stationary stretches: over-insulate rather than under, and add a liner sock.
A boot rated to -20°C, like the Kamik Men's Trek Ice waterproof snow boots, covers most cold-weather day hikes. For city-to-trail days in deeper cold, the Kamik The Spencer Sport boots rated to -30°C add a wider comfort margin.

Why Insulated Hiking Boots Need the Right Warmth Rating
Insulated hiking boots trap body heat with a synthetic layer, and that layer only works if it matches your output. Over-insulated boots make feet sweat, and wet feet get cold fast. Under-insulated boots leave toes numb on the first descent.
The rating on the box assumes moderate activity. A fast snowshoe climb generates far more heat than a slow photo walk, so the same boot can feel perfect on one trip and clammy on another. Treat the rating as a starting point, not a guarantee.
How Activity Level Changes Your Warmth Needs
Your body produces heat while moving, and a boot that's cozy standing still can turn into a sauna on a steep climb. Match the boot to your pace:
- Fast, sustained climbing: choose less insulation than the temperature suggests; you'll run warm.
- Slow walks, photography, or winter camping: choose more insulation, since you generate less heat.
- Mixed pace with stops: a mid-rated boot plus a warm sock gives flexibility.
Waterproof Winter Hiking Boots: Membranes, Uppers, and Maintenance
Waterproof winter hiking boots rely on a membrane plus a treated upper to keep slush and meltwater out. The membrane is a thin layer that blocks liquid water while letting some vapor escape. Uppers are usually leather, synthetic, or a blend, and each behaves differently.
- Leather uppers are durable and mold to your foot over time, but they need regular waterproofing.
- Synthetic uppers are lighter and dry faster, though they can stiffen in extreme cold.
- Membranes like a DriDefense layer stop water at the seams, which is where most leaks start.
Maintenance matters as much as the build. Clean mud off before it dries, reapply a waterproofing treatment each season, and never dry boots on a hot radiator, which can damage the membrane. A well-cared-for pair lasts several winters; a neglected one leaks by February.
Winter Hiking Boot Traction: Lug Depth, Rubber Compounds, and Traction Devices
Traction comes down to three things: lug depth, rubber compound, and whether you add a device for ice. Deep lugs bite into snow and mud, while the rubber compound decides how well the sole grips wet ice. A soft compound grips ice better but wears faster on rock.
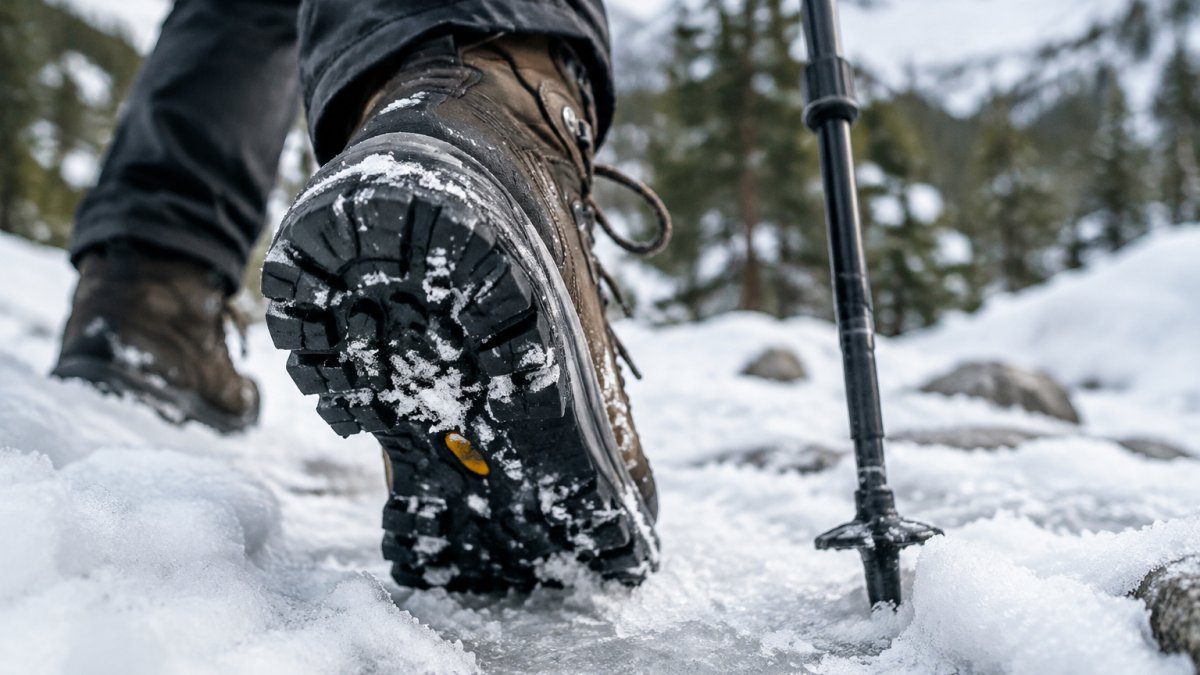
For packed snow and mixed terrain, deep lugs with an ice-grip rubber are enough. In deep, unconsolidated snow, snowshoes spread your weight so you stop postholing; an aluminum alloy adjustable snowshoe is the tool for that job.
Matching Traction Devices to Boots and Conditions
Traction devices are not interchangeable, and the boot you choose determines which ones will fit and work. Use this decision framework before you buy.
- Microspikes: best for packed snow, icy trails, and mixed winter hiking where you alternate between snow and exposed rock. They need a flexible or semi-stiff boot with a defined heel and toe welt so the harness stays put. A very soft, low-profile sole can let the spikes shift; a very stiff mountaineering boot is overkill and can make the spikes skate on rock.
- Crampons: for steep, hard ice and sustained icy slopes where microspikes don't bite. They require a stiffer boot, and many models need a heel welt or a full automatic or semi-automatic binding. A flexible hiking boot may not accept a crampon safely, so check the binding type against the boot's stiffness and welt before committing.
- Snowshoes: for deep, unconsolidated snow where flotation matters more than bite. They work with most winter hiking boots, but bulky boots can crowd the binding and very stiff mountaineering boots reduce the natural ankle flex snowshoes rely on. Match the snowshoe's weight rating to your loaded weight, including pack.
Sole shape matters as much as stiffness. A deeply lugged, wide sole can make some strap-on devices harder to center, while a narrow, rounded sole may let the device rotate.
Watch out: a traction device that shifts or pops off on a slope is worse than no device at all, so never size a binding by guesswork.
When Footwear Alone Is Not Enough
Traction devices extend your range, but they have limits. On bare rock, pavement, and lodge floors they are slippery and can damage surfaces, so remove them when the ice ends. On very steep or exposed terrain, microspikes and crampons are not a substitute for mountaineering skills, an ice axe, or a rope.
A practical rule is to match the device to the worst condition you expect, not the average. If the trip includes a short icy section, microspikes and a semi-stiff boot are usually enough. If ice is the main event, choose the boot around the crampon binding first, then add insulation.
Kamik Men's Trek Ice -20C Waterproof Snow Boots | 8 & 13 US →
Winter Hiking Boot Fit: Sizing, Toe Room, and Heel Hold
Winter hiking boot fit is about toe room, heel hold, and space for a thicker sock, not just your usual shoe size. A secure fit keeps your heel locked so you don't slide forward and jam your toes on descents.
Start with your normal size, then try half a size up if you'll wear thick socks. You want a thumb's width of space at the toe and a heel that stays put when you walk. Women should look for women's-specific lasts rather than scaled-down men's boots, since the fit through the heel and arch differs.
How to Test Fit at Home With Winter Socks
Test the fit the way you'll actually hike: with your winter socks on, late in the day when feet are largest.
- Put on the socks you'll wear on the trail.
- Slide your foot in and press your heel to the back.
- Check for a thumb's width of space at the toe.
- Walk up and down stairs to feel for heel lift.
- Kick a wall gently to confirm your toes don't hit the front.
Replicate real trail conditions by testing with a thick hiking sock, like a thickened towel-bottom hiking sock. If your feet run cold or wet, a waterproof unisex crew sock works as a backup layer. For sizing winter boots with bulky socks, the thick professional ski sock is a good stand-in for the volume you'll actually wear.

Boot Height, Gaiters, and Snow Protection
Boot height, or shaft height, decides how much snow and slush can reach your ankle. A mid-cut boot suits packed trails and moderate snow. A taller boot keeps deep snow out and pairs with gaiters for extra coverage. Gaiters seal the gap between boot and pant leg, stopping snow from creeping in on posthole steps.
For deep snow and mixed terrain, a taller shaft plus gaiters is the difference between dry socks and a miserable, wet descent. Match the height to your terrain: low trails need less, deep drifts need more.
Managing Moisture and Drying Boots in the Field
Feet sweat even in cold weather, and trapped moisture is what turns a warm boot cold. Moisture management starts with a wicking liner sock and a breathable boot, and continues with how you dry gear overnight. Pull insoles out after a hike so they can air, stuff boots with dry newspaper or a cloth to draw out damp, and never leave them sealed in a pack.
Watch out: drying boots too close to a fire or heater can crack leather and warp the membrane, so air-drying at room temperature is safest. On multi-day trips, rotate socks and keep a dry pair reserved for camp.
A Field Strategy for Sweat, Wet Socks, and Overnight Drying
During the hike: start with a thin wicking liner sock under a thicker insulating sock. The liner moves sweat away from the skin; the outer sock holds warmth.
At breaks and at camp: change socks before they are soaked, not after. Carry one spare pair per day for a multi-day trip and keep it in a dry bag.
Overnight: stuff each boot with dry newspaper, a cloth, or a dedicated drying insert, and replace the stuffing once if it feels damp.
Spare-Sock and Liner Strategy by Trip Length
- Day hike: one pair of liner socks and one pair of insulating socks, plus one spare insulating pair in the pack for the drive home or an emergency.
- Overnight trip: two insulating pairs and one or two liner pairs, rotated so one set dries while you wear the other.
- Multi-day winter trip: one insulating pair per day plus one dry reserve, and a dedicated camp pair that never goes in the boot for hiking. Keep the camp pair in a dry bag.
A common pattern is that cold feet on the second day trace back to wet socks from day one, not to the boot's rating. If your feet get cold despite a warm boot, check the sock layer first: a damp liner or a bunched outer sock can cut circulation and cancel the insulation. Fixing moisture often does more for warmth than buying a warmer boot.
Match Boots to Your Terrain and Trip Conditions
The final decision is a match between boot and trip, not a single "best" boot. Use your terrain and conditions to narrow the field:
- Packed trails and casual walks: a mid-cut, -20°C boot with deep lugs.
- Icy slopes and mixed terrain: prioritize ice-grip rubber and plan for microspikes.
- Deep snow and backcountry: taller shaft, gaiters, and snowshoes.
- Longer cold-weather days: a hydration pack keeps water from freezing and hands free; a 15L insulated hydration pack with a 3L bladder suits winter day trips.
For women, the Salomon AVO W+ winter boots rated to -18°C are a lightweight option for mixed winter use, and the Kamik Women's Celeste M boots rated to -20°C blend warmth with a waterproof, seam-sealed build.

| If your trip is... | Prioritize | Boot rating to target |
|---|---|---|
| Casual packed trails | Deep lugs, mid-cut | Around -20°C |
| Icy slopes | Ice-grip rubber, microspikes | Around -20°C |
| Deep snow, backcountry | Tall shaft, gaiters, snowshoes | -20°C to -30°C |
| City-to-trail, deep cold | Sneaker-style, wide margin | Around -30°C |
Frequently Asked Questions
How should winter hiking boots fit?
Winter hiking boots should fit snug at the heel with a thumb's width of space at the toe, measured while wearing your thickest winter socks. Your heel should not lift when you walk, and your toes should not press the front of the boot on downhills. Try boots on late in the day when feet are slightly larger, and test them on an incline to confirm heel hold and toe room before you commit.
Are waterproof boots necessary for winter hiking?
Waterproof winter hiking boots are worth it for most Canadian trails because snow, slush, and wet terrain soak through non-waterproof uppers quickly. Look for a boot with a waterproof membrane and a water-resistant leather or synthetic upper. No boot stays waterproof forever, so clean mud off after each trip and refresh the water repellency on leather uppers with a suitable treatment to keep water resistance working.
What type of sole is best for hiking on snow and ice?
For winter hiking boot traction, choose an outsole with deep lugs (at least 5 mm) and a rubber compound designed for cold conditions, since standard rubber hardens and loses grip below freezing. Boots with ice-specific compounds, like the GRIP ICE DEFENSE or Vibram Arctic Grip found on Kamik models, add grip on wet ice. For steep or icy terrain, pair your boots with microspikes or crampons rated for your boot type.
Do winter hiking boots need to be compatible with crampons or microspikes?
Only if you plan to hike steep or icy terrain. Microspikes fit most insulated hiking boots with a flexible sole and a defined heel welt. Crampons with steel points need a stiffer boot, often with a toe and heel welt, so check compatibility before buying. If your trips stay on packed trails and rolling terrain, deep lugs on the outsole are usually enough without traction devices.
Choosing winter hiking boots gets far easier once you stop shopping by brand and start shopping by conditions. ABsnowlife curates winter gear for both mountain slopes and local trails, with a Canadian outlook on what actually works in the cold. Browse our collection to match insulation, waterproofing, and traction to your next trip, and step onto the snow with feet that stay warm and dry. Get started with ABsnowlife and find the pair built for your conditions.